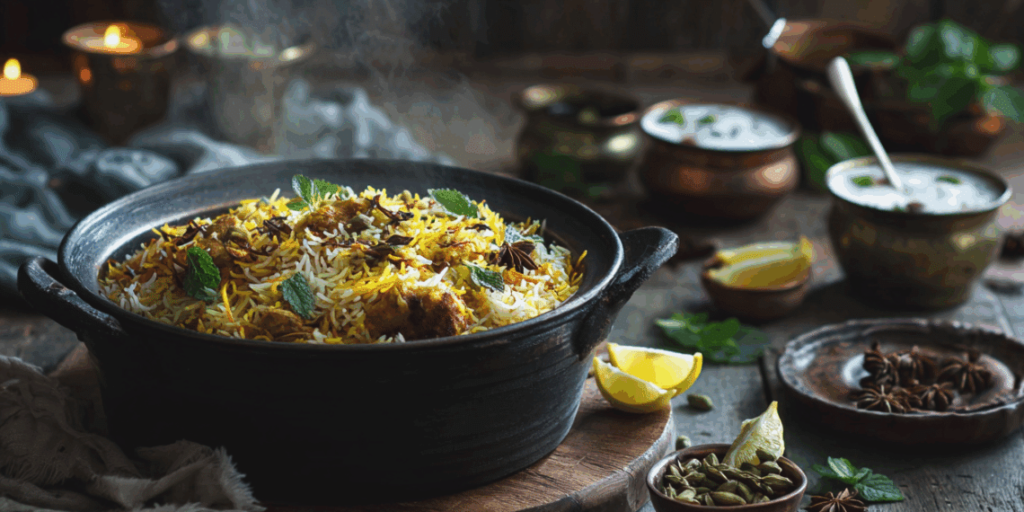
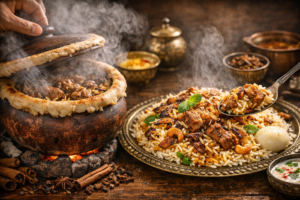
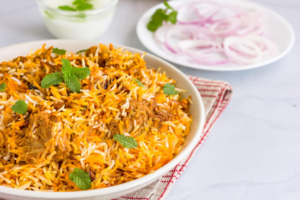
There are very few sensory experiences in life that can match the pure, intoxicating aroma of a well-cooked biryani. The moment that heavy-bottomed pot starts simmering on the stove, your entire kitchen undergoes a shift. It fills the room with a warm, earth-born fragrance—aged basmati, toasted spices, fresh garden herbs, and a slow-cooked masala that instantly makes a house feel like a home.
For me, and for millions of us, biryani is far more than just a recipe on a page. It is a shared memory, a celebration of patience, and the ultimate comfort food. Whether it’s anchoring a festive family gathering, bringing people together on a lazy Sunday afternoon, or offering solace after a chaotic week, biryani always feels like an event.
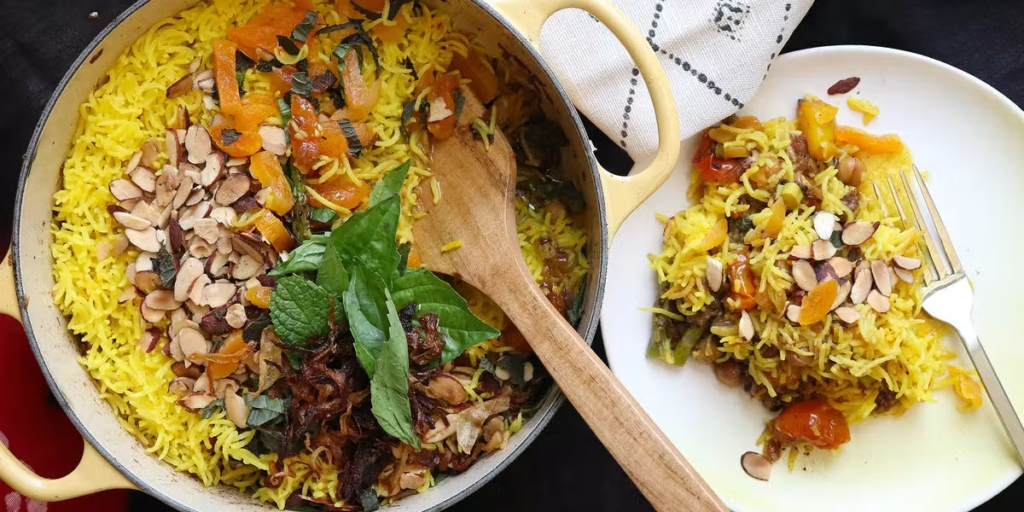
What makes it so incredibly special is its delicate ecosystem of flavors. It is a perfect, mindful harmony of fluffy rice, tender protein or vegetables, sweet caramelized onions, cool yogurt, and a thoughtful curation of spices.
Many people hesitate to try making it at home, assuming it’s a masterclass meant only for professional chefs. I used to feel the exact same way. But the truth is, biryani only looks intimidating because it has multiple steps. Once you understand the natural rhythm of the process, it becomes an incredibly rewarding, almost therapeutic kitchen ritual. With a little mindfulness and the right ingredients, you can easily create restaurant-quality biryani in your own kitchen.
This beginner-friendly guide is designed to help you bypass the kitchen chaos and focus on the joy of creating authentic flavors. The reward? A stunning, fragrant masterpiece that you and your loved ones will talk about long after the meal is over.
Why Biryani Is a Culinary Masterpiece

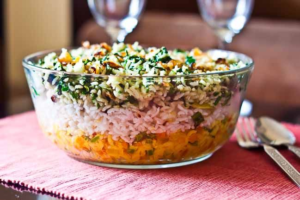
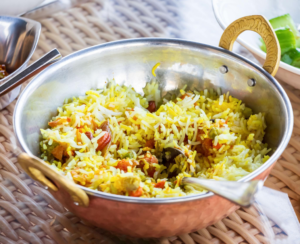
Authentic biryani is never just rice mixed with curry. If you look closer, it is a carefully layered masterpiece where every single element retains its unique identity while contributing to the whole. The rice grains remain proudly separate and fluffy, while the masala underneath holds a deep, soulful warmth.
What separates biryani from ordinary rice dishes is the traditional layering technique. Instead of throwing everything into one pot from the start, we partially cook the components separately and then bring them together. This mindful separation preserves textures and creates a complex, evolving flavor profile. Every forkful offers a slightly different experience—sometimes a bite of spice-kissed rice, sometimes a burst of fresh mint, and sometimes a deeply seasoned, tender piece of meat.
Your Kitchen Gathering List
Before you light the stove, take a moment to breathe and gather these gifts from nature. Having everything measured out ahead of time keeps the cooking process feeling calm, smooth, and intentional.
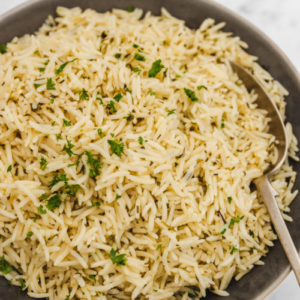
For the Fragrant Rice
- 2 cups premium long-grain Basmati rice
- 6 cups water
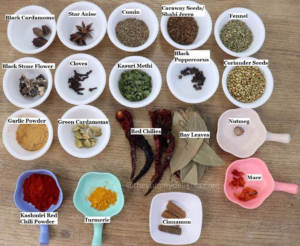
- 2 dried bay leaves
- 4 green cardamom pods
- 4 whole cloves
- 1 cinnamon stick
- 1 teaspoon salt
For the Soulful Masala
- 500 grams chicken or mutton (cut into bone-in pieces for maximum flavor)
- 2 large onions, sliced wafer-thin
- 2 juicy tomatoes, finely chopped
- 1 cup fresh whole yogurt (curd)
- 2 tablespoons ginger-garlic paste
- 2 green chilies, slit lengthwise
- 1 teaspoon turmeric powder
- 1 teaspoon Kashmiri red chili powder
- 1 teaspoon garam masala
- 1 teaspoon coriander powder
- ½ teaspoon cumin powder
- Salt to taste
- A generous handful of fresh mint and coriander leaves
- 3 tablespoons oil or pure ghee
For the Final Layering
- A pinch of saffron threads soaked in 2 tablespoons of warm milk
- Reserved fried onions (from the masala step)
- 1 tablespoon melted ghee
- Extra mint and coriander leaves for a fresh finish
Step-by-Step Guide: Bringing It All Together
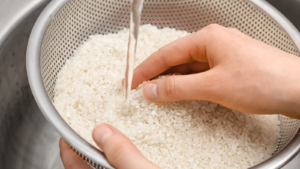

Step 1: Cleanse and Awaken the Rice
Start by washing your basmati rice under cold water two to three times. Watch the cloudy water run clear; this simple act removes the excess surface starch that causes stickiness. Once rinsed, submerge the rice in clean water and let it soak for 30 minutes. Think of this as waking up the grain—soaking allows the rice to stretch to its full, elegant length when cooked, ensuring that ultimate fluffy texture.
Step 2: Caramelize the Onions (The Secret to Depth)
Heat your oil or ghee in a large, heavy pan. Toss in your thinly sliced onions. Keep the heat at a steady medium and stir them regularly. This requires a little patience, but watch as they transform from pale white to a deep, glistening golden brown. These crispy jewels (known as birista) lend a rich, sun-sweetened depth to the dish. Once they are perfectly crisp, scoop half of them out and set them aside on a paper towel for layering later.
Step 3: Build the Foundation of the Masala
In the same aromatic oil, slide in the ginger-garlic paste and green chilies. Sauté for a minute until the raw, sharp edge softens into a sweet fragrance. Add your chopped tomatoes, cooking them down until they melt into the oil.
Next, stir in your dry spices: turmeric, chili powder, coriander, cumin, garam masala, and salt. Cook this paste mindfully until you see tiny droplets of oil separating at the edges—this is the visual cue that your spices are thoroughly roasted.
Whisk your yogurt until smooth and lower the heat before stirring it in. The yogurt softens the intense spices, creating a velvety, tangy gravy. Now, add your meat, tossing the pieces until they are completely cloaked in the rich masala. Cover and let it simmer on a gentle flame (10 to 15 minutes for chicken; longer for mutton) until the meat absorbs the flavors and becomes wonderfully tender. Toss in a handful of fresh mint and coriander right at the end. Your masala should be thick, concentrated, and incredibly aromatic.
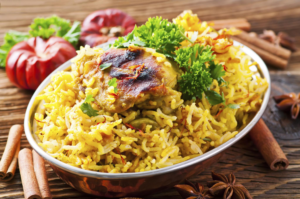
Step 4: Cook the Rice with Nature’s Spices
In a separate, large pot, bring 6 cups of water to a rolling boil. Drop in your whole spices: bay leaves, cardamoms, cloves, and cinnamon, along with a teaspoon of salt. Instantly, the steam will carry the sweet, woody essence of the forest.
Drain your soaked rice and gently slip it into the boiling water. Keep a close eye on it now; you only want to cook the rice until it is 70% done. When you press a grain between your fingers, it should break easily but still have a firm, slightly raw core. Remember, it will finish cooking in the steam later. Drain the water immediately and spread the rice out gently.
Step 5: The Art of Layering
This is where the alchemy happens. Grab a heavy-bottomed pot (or use the one with your masala).
- Leave a rich layer of the cooked masala at the very bottom.
- Carefully spoon a fluffy blanket of the par-boiled rice over it.
- Scatter a handful of your reserved golden fried onions, fresh mint, and coriander across the rice.
- Drizzle a spoon of melted ghee and spoonfuls of the golden saffron milk across the surface for beautiful color variation.
- Repeat the layers if your pot is deep, ensuring your final top layer is pristine white rice adorned with the remaining herbs, onions, and saffron.
Step 6: The Dum Cooking (The Slow Infusion)
Cover the pot with a tight-fitting lid. To truly honor the traditional method, you can seal the edges of the lid with a simple strip of wheat flour dough to trap every drop of steam inside.
Place the pot over your lowest possible stove setting and let it sit in its own heat for 20 to 25 minutes. This ancient, slow-cooking technique is called Dum. Inside the dark, sealed pot, a micro-climate forms. The steam rises through the layers, infusing every single grain of rice with the deep, savory character of the bottom masala and the botanical freshness of the herbs. When you finally break the seal and lift the lid, the cloud of steam that hits your face will instantly tell you that your masterpiece is ready.
How to Serve Your Masterpiece
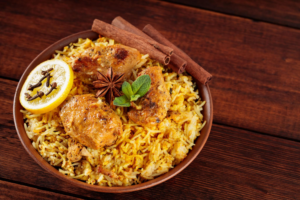
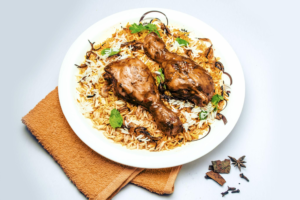
Biryani demands to be served piping hot, straight from the pot to the plate. When serving, resist the urge to mix it vigorously. Instead, use a flat spoon or saucer to scoop from the very bottom, gently fluffing it so the distinct white, golden, and deeply seasoned layers are beautifully showcased on the platter.
Complement the warm complexity of the spices with simple, refreshing sides:
- Cooling Raita: A simple mix of yogurt, grated cucumber, and a pinch of roasted cumin completely balances the heat.
- Fresh Garden Salad: Crisp sliced red onions, cucumbers, and a squeeze of fresh lime juice add a lovely textural contrast.
- Boiled Eggs: A classic accompaniment tucked neatly alongside the rice.
Pro-Tips for Kitchen Success
- Invest in the Rice: Always choose high-quality, aged, long-grain Basmati rice. Cheaper, short-grain varieties carry too much starch and will turn into a sticky porridge.
- Trust the 70% Rule: Overcooking the rice during the initial boil is the most common mistake. Erring on the side of undercooked is safer, as the steam (dum) can always fix it.
- Embrace Fresh Herbs: Never substitute dried mint or coriander here. The living, bright freshness of green herbs is vital to cutting through the richness of the ghee and spices.
- Let It Rest: Once you turn off the heat after the dum process, leave the pot closed for another 10 minutes. This allows the internal pressures to settle and lets the flavors lock into the grains.
FAQ’s
Why Fashion & Style Now Focus on Comfort and Performance
Here’s your paragraph with the focus keyword “Fashion & Style Now Focus” added naturally for…

Amazing Recipes for Breakfast, Lunch, and Dinner
Here’s your paragraph with the focus keyword “Amazing Recipes for Breakfast” naturally added for SEO:…

The Future of Fashion & Style: Trends, Comfort, and Luxury
Fashion has always been far more than just an assembly line of fabric, precise stitching,…

World’s Best Adventure Places You Need to Visit Once
Adventure means something different to everyone. The best adventure experiences can be climbing mountains, diving…

Why Oversized Fits Are Dominating Western Fashion Right Now
Fashion has always moved in natural cycles, much like the seasons. Styles that once felt…

Easy Biryani Recipe for Rich and Authentic Flavor Biryani
There are very few sensory experiences in life that can match the pure, intoxicating aroma…